Final
Thursday May 11 from 10-noon is the “final.” This means we have to have everything submitted by noon on Thursday to the dropbox (or email if we cannot access it). We need a pdf of notes and a pdf of the look and feel of our site- mobile and desktop. Make sure we include the url of our site on this so Markus can go there!!!
Shop iframe
Shop needs to be brought in using an iframe because the plugin died.
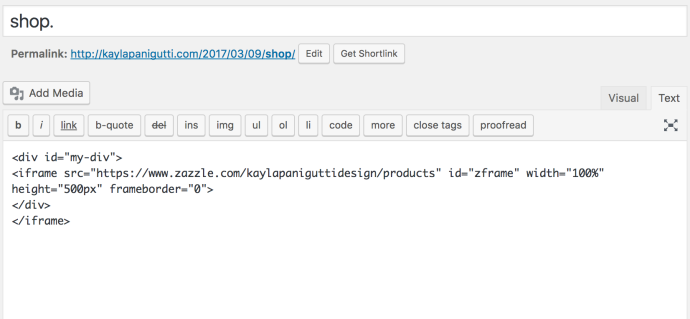
This will yield this result:

To fix this, we need to add code in css.
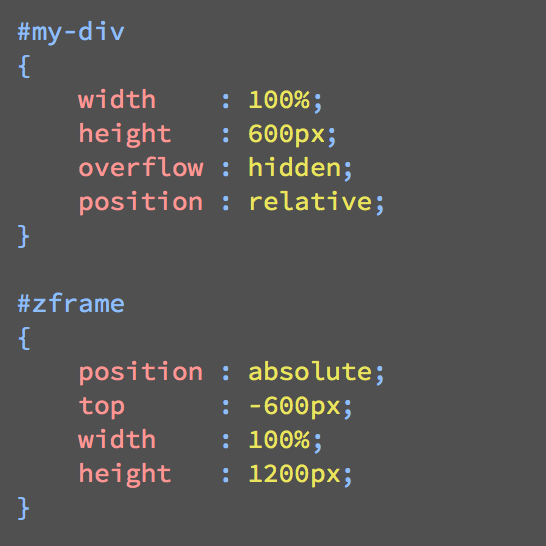
And it worked!!


There was some difficulty with the store. Marcus suggested using Pizazz, a plugin, but it is outdated now. Instead, we started working with zStoreManager but it is messing with all of my settings. The store feed will not come up and it disables my smooth scroll and doesn’t let me see anything below the store section of the page.
UPDATE: Marcus told us to deactivate the plugin as he tries to find a solution.
What’s left this semester
- Clean-up and learning about integration (social media and shop).
- Mobile
- Rebuild or redesign if needed
Shop Site

A store is set up on Zazzle!
March 23rd
- We edited the settings of Jetpack and our discussion (pictures uploaded soon).
- Installed Akismet
- For the next project we need 12 products to be designed to be sold. Decide which e-commerce site to sign up for. For return after spring break have a store set up and have 2-3 products in it.
- Work on portfolio pages and making it convert to mobile

Website Comments
- Smooth scroller offset- find plugin
- Center all titles or make them all flush right….decide which to stick with for cohesion of the design
- Lead out the “p” type
- Make the icons in Contact larger- use the icons from the footer
- Revisit the single php
- Fix the wordpress blog link
Tuesday March 14th
Installing wordpress fancybox:
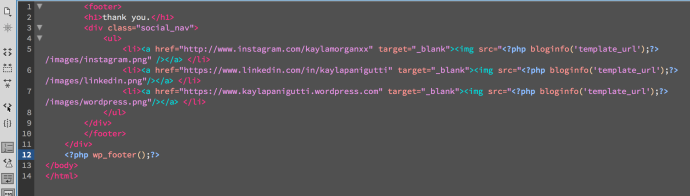
To get fancybox to work, take out all of the previous fancybox code we had and install a plugin called Easy Fancybox. For it to work, we also have to add wp php code in our header and footer. Now our galleries will pop up in fancybox style with buttons. We can also add a field large so that we can open our port_medium image larger in a fancybox style as well.

Fixing problems:
- DO NOT FORGET NO CAPITAL LETTERS. I called my resume KaylaPaniguttiResume and it would not link. The name change magically let it link. NO CAPITAL LETTERS!!!!!
- To link back to our page from the single portfolio pages, we need to put our header info in to each instead of putting the “get header” command. Then, change the a href from #about to the actual http address of the page.
Still to be fixed:
- Smooth scrolling
- Ugliness. I still don’t like some aspects (header, main, single portfolio pages).
Thursday March 9
Today we started over and downloaded wordpress to put it on our individual servers.
Setting up:
We started by logging in to fetch and accessing cpanel by going to kaylapanigutti.com/cpanel and putting the login info from fetch in it. Then go to WordPress.org -> download -> unzip file on desktop.
We dragged all of the files from the wordpress download file in to fetch except for the file called wp-config-sample.php. Rename that file to wp-config.php and open it in dreamweaver.
On CPanel scroll down to Databases-> mysql database wizard and make a database and username. Put that info in to the wp-config.php file in their appropriate places. Drag it in to fetch once saved. If you change wp-config.php on your computer you then have to upload it to fetch again. Now when you go back to your site (kaylapanigutti.com) it should show this:
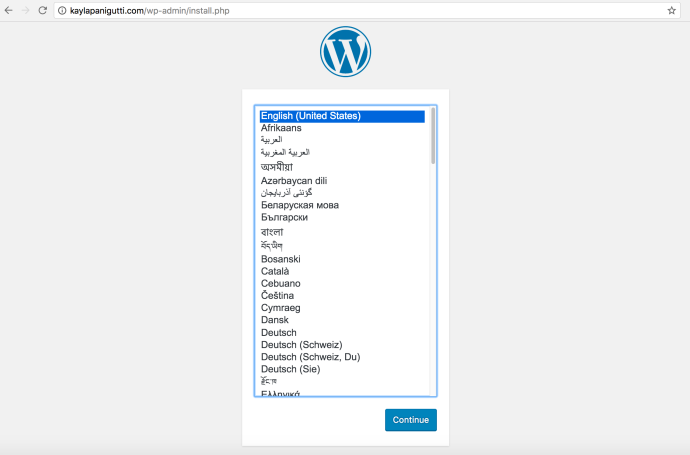
Start setting up your WordPress account and click download wordpress. It will take you to your dashboard once you’re done.
To get our themes in to this new wordpress, drag your old theme folder from htdocs to the wp-content folder in fetch. If we change anything we will have to reload it to fetch!! While we wait for this to load we are setting up security.
To set up security in wordpress, we install a plugin called Jetpack. After it’s downloaded, activate it, go to the jetpack page under dashboard and go through the steps (making sure to select the free one). Make sure you are logged into your blog as well because that will let you log in.
While you’re installing plugins, install Advanced Custom Fields. Go to custom fields on the left side of the page and set up your fields like before. We had a port_thumb and a port_medium.
Once this is all done, add pages and categories, and make sure to assign templates.
